
Namecheap: Affordable, Secure, and Reliable Web Hosting for Everyone
Namecheap empowers individuals and businesses to establish a strong online presence with budget-friendly pricing and top-tier hosting solutions. Whether you're launching a personal blog, building a professional website, or running a full-scale eCommerce store, Namecheap offers flexible hosting plans tailored to your needs.
With robust security features, lightning-fast performance, and 24/7 expert support, you can focus on growing your brand while Namecheap takes care of the technical complexities. Their user-friendly platform makes website management effortless, ensuring a seamless experience for beginners and experienced developers alike.

Why Choose Namecheap?
With so many domain registrars and hosting providers available, what makes Namecheap stand out? The answer lies in its affordability, ease of use, and commitment to security. Since its launch in 2000, Namecheap has helped millions of customers register domains, set up websites, and secure their online assets.
1. Affordable and Transparent Pricing
One of Namecheap’s biggest selling points is its budget-friendly pricing. Unlike some providers that lure customers in with low introductory rates and then hike up the renewal fees, Namecheap offers consistent and transparent pricing. You can register a .com domain for as low as $9.98/year, making it an excellent choice for startups and individuals looking to keep costs low.
2. Reliable Web Hosting Solutions
Beyond domains, Namecheap provides various hosting options, including:
- Shared Hosting – Ideal for beginners and small websites.
- WordPress Hosting – Optimized for WordPress users with faster performance.
- VPS Hosting – More power and control for growing websites.
- Dedicated Servers – High-performance servers for large-scale businesses.
3. Free Domain Privacy Protection
One major perk of Namecheap is its free WHOIS privacy protection. When you register a domain, your personal information is stored in public databases. Namecheap shields your name, email, and phone number from spammers and identity thieves—at no extra cost.
4. User-Friendly Interface
Managing domains and hosting services can be overwhelming for beginners. Namecheap’s intuitive dashboard makes it easy to register domains, set up email accounts, manage DNS settings, and install WordPress. The clean and user-friendly interface ensures that even non-tech-savvy users can navigate with ease.
5. Strong Security Features
Security is a top priority in today’s digital world, and Namecheap provides:
SSL Certificates – Secure your website and boost SEO rankings.
Two-Factor Authentication (2FA) – Extra protection for your account.
Premium DNS – Faster and more secure domain name resolution.
Get ready to kick off your next idea
Whether you're starting your first solo business or aiming to expand an existing one, we provide all the tools to transform your side hustle into a full-fledged brand. Secure premium domains, reliable hosting, and essential security, then take advantage of our Build & Grow Hub to perfect your venture. This is designed for independent dreamers and doers—the solopreneurs.
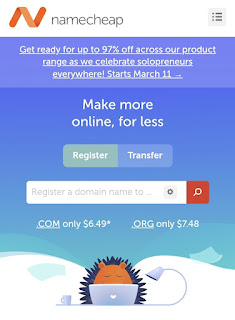
- Sale begins March 11 at 12:00 AM ET
Visit our Solopreneur Sale to save up to 97% on domains, hosting, security, and growth tools. Whether you’re diving into your first solo venture, or are looking to scale one up, shop these unbeatable offers today!
- Sale ends March 17 at 11:59 PM ET
Namecheap vs. GoDaddy and Bluehost: Why It’s the Best Choice
- Get .Com domain for only 6 dollars, by clicking on this promo code: NEWCOM649
Is Namecheap Worth It?
How to Use Namecheap: A Step-by-Step Guide
Namecheap is one of the best platforms for registering domains, buying hosting, and securing websites. Whether you're launching a blog, an eCommerce store, or a business website, Namecheap makes the process simple and affordable.
Step 1: Sign Up for a Namecheap Account
Before purchasing a domain or hosting, you need to create an account:
1. Visit Namecheap's website.
2. Click on “Sign Up” in the top-right corner.
3. Enter your email, username, and password, then click Create Account.
Step 2: Search for a Domain Name
A domain name is your website’s address (e.g., yourbusiness.com).
1. Go to the Namecheap homepage and use the domain search bar.
2. Type in your desired domain and click Search.
3. Choose an available domain and click Add to Cart.
4. Namecheap offers free domain privacy protection, so no need to worry about extra charges.
Step 3: Choose a Hosting Plan
To make your website live, you’ll need hosting. Namecheap offers different types of hosting:
Shared Hosting (best for beginners).
WordPress Hosting (for fast, optimized WordPress sites).
VPS Hosting (for websites needing more power).
Dedicated Servers (for large businesses).
1. Click on “Hosting” in the navigation menu.
2. Choose a plan based on your needs and click Get Started.
3. If you purchased a domain, connect it to your hosting plan.
Step 4: Install WordPress or Another Website Builder
Once your hosting is set up, you can install a website builder:
1. Log in to your Namecheap account.
2. Navigate to the cPanel (control panel).
3. Find Softaculous Apps Installer and select WordPress.
4. Click Install Now, enter your site details, and wait for installation to complete.
Step 5: Secure Your Website
To protect your website, set up:
SSL Certificate (often included for free with Namecheap hosting).
Automatic Backups to prevent data loss.
Security Plugins like Wordfence for WordPress users.

Step 6: Set Up Professional Email (Optional)
If you need a custom email like [email protected], Namecheap provides email hosting options:
1. Click on “Email” in the top menu.
2. Choose a plan and follow the setup instructions.
Step 7: Launch Your Website!
Once everything is set up, you can start adding content, customizing your design, and promoting your website.
Bonus Tip: Don’t forget to renew your domain and hosting annually to keep your website active.
If you are looking for an affordable and reliable domain registrar? Click below to register your domain now!


 WhatsApp


Follow Us